How to Brief Clothing Hem Coverstitch
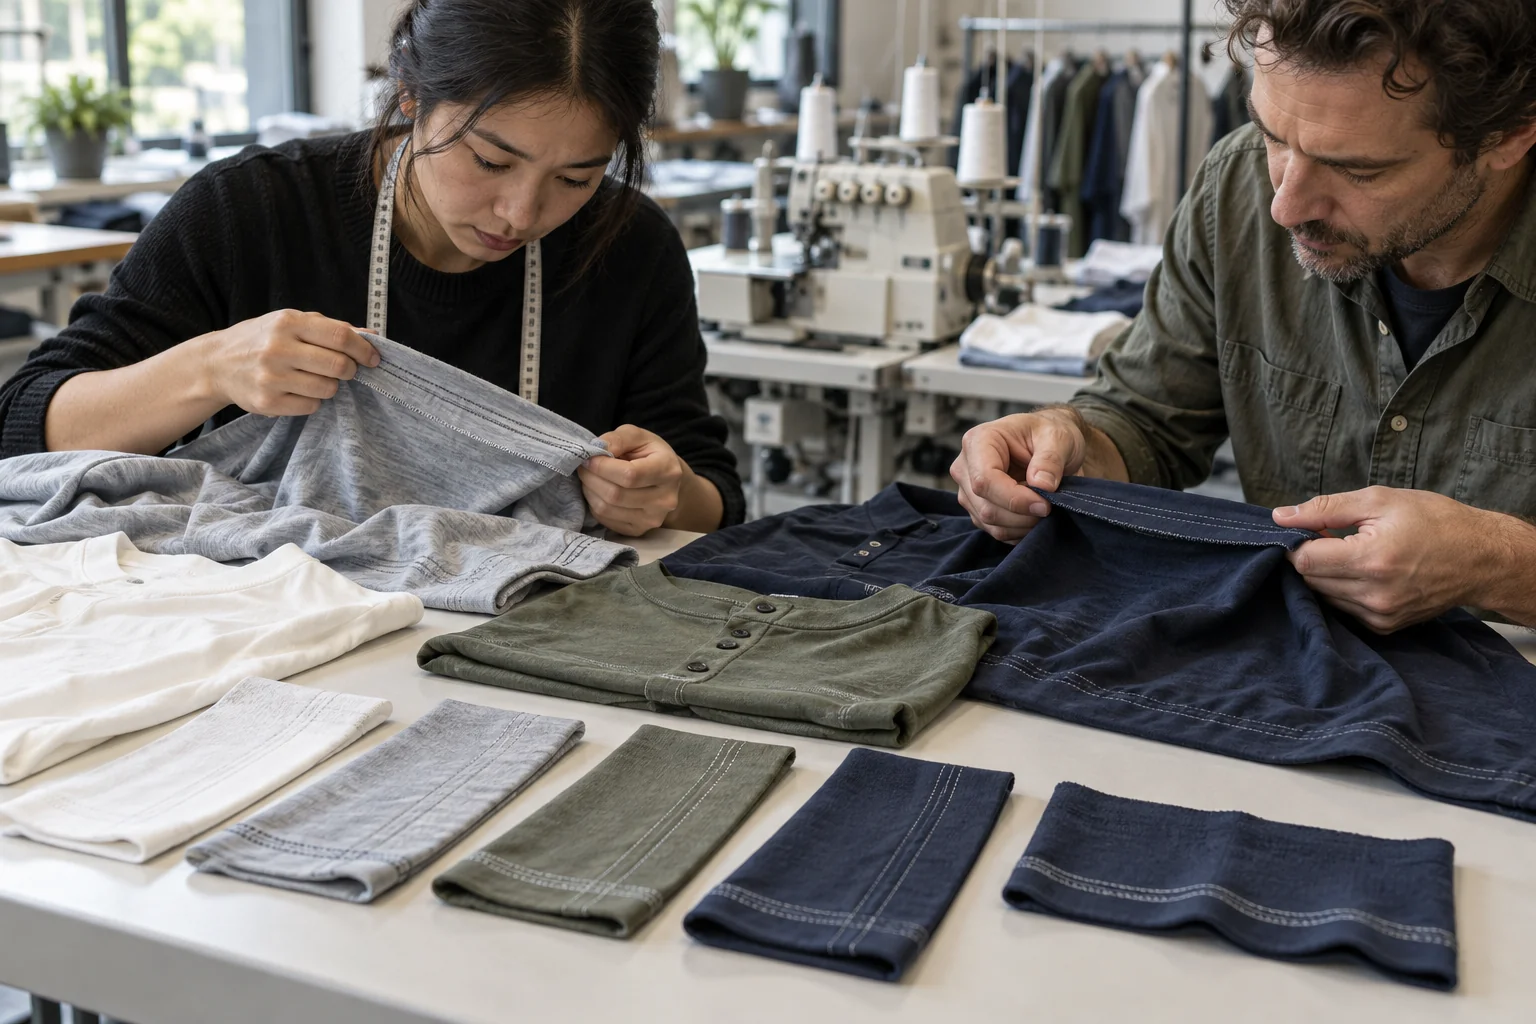
A useful hem coverstitch brief separates the finished hem depth, the spacing between visible needle lines, and the construction method. For menswear tees, henleys and polos sourced from a China OEM factory, specify bottom and sleeve hems individually rather than assuming one instruction fits both. Include fabric details, measurement references, thread appearance and sample acceptance criteria. MOQ is 100 pcs; samples take approximately 7 days once the brief and materials are confirmed, while bulk timing depends on quantity.
At a glance
Swipe the table sideways to compare both columns →
| Hem decision | What to specify | Sample check |
|---|---|---|
| Bottom and sleeve hem dimensions | State finished hem depth and visible needle spacing separately, in millimeters, for each location. | Measure relaxed hems at several points and compare them with the approved drawing and tolerances. |
| Coverstitch versus twin-needle construction | Name the required stitch construction, needle count and underside appearance; request confirmation of machine capability. | Inspect face and underside, then assess extension and recovery without forcing the seam beyond intended use. |
| Folding allowance and edge coverage | Specify fold construction, pattern allowance, needle placement and how the underside stitching should cover the raw edge. | Check for exposed raw edges, uneven turnback, excessive bulk and stitching that misses the folded allowance. |
| Waviness on lightweight jersey | Identify fabric weight, composition, stretch behavior and the relaxed appearance expected after agreed care. | Inspect the unforced hem before and after the agreed wash and drying process, not only immediately after pressing. |
| Contrast thread | Identify the face needle-thread colors, underside thread color and physical shade reference. | Compare color under consistent lighting and inspect corners, overlaps and seam crossings for conspicuous irregularities. |
1. Define hem depth and needle spacing separately
Start the brief with separate entries for the bottom hem and sleeve hems of each menswear style. The phrase hem width is ambiguous: one person may interpret it as the folded hem depth, while another reads it as the distance between needle lines. Label the finished hem depth from the folded garment edge to the upper boundary of the turnback, and label visible needle spacing between the outer needle lines. State the units, measurement method and agreed tolerance for each dimension. A marked section sketch is useful because it shows where the fold, raw edge and needle lines should sit relative to one another.
For a tee, the bottom and sleeve hems may use the same construction but different finished depths. A henley or polo may also have side vents, a stepped hem or other details that need separate instructions rather than a continuous straight-hem assumption. Specify where the coverstitch starts and ends around those features, and ask the factory to propose a clean finishing method for approval. Record whether dimensions remain constant across sizes or change with the size specification. How to Brief Clothing Sleeve Hem Construction is companion reading for connecting these hem decisions to sleeve shape, opening measurements and the overall garment construction.
2. Name the stitch construction and folding allowance
Do not use coverstitch and twin needle as interchangeable instructions. A common two-needle coverstitch gives two visible lines on the garment face and a looper-thread formation underneath, while a twin-needle lockstitch construction has a different underside and different extension characteristics. Factories may use informal terminology differently, so request a face and underside photograph or a sewn reference before agreeing on the method. State the required needle count, visible spacing and intended performance at the hem opening. If a stitch class or code is used, ask the factory to confirm it rather than relying on a code alone to communicate the construction.
Next, separate the finished fold depth from the pattern allowance needed to make it. For a simple single-turn hem these measurements are closely related, but trimming, edge finishing and additional folds can change the required allowance. Show the intended raw-edge position and ask the factory to confirm that the proposed needle spacing and seam placement will secure the turnback and provide the agreed underside coverage. Avoid prescribing machine settings without checking the actual fabric and available equipment. How to Brief Clothing Coverstitch Topstitch provides companion context for distinguishing decorative visible stitching from the construction that secures a folded edge and must tolerate garment movement.
3. Address light jersey waviness and contrast thread
For lightweight jersey, describe the fabric before discussing the seam: provide composition, nominal weight, stretch direction, available stretch or recovery information, and the intended care instructions. Wavy hems can involve fabric handling, feed balance, thread tension, needle choice or the way a sample has been pressed. Ask the factory to trial settings on the actual production-intent material rather than promising a universal adjustment that will solve every fabric combination. Review the hem lying naturally without pulling it straight. Where wash appearance matters, agree on the wash and drying method and compare the relaxed result afterward, documenting the conditions instead of presenting an informal check as a laboratory result.
Contrast thread makes irregular needle lines and overlaps easier to see, so include more than a general instruction such as white stitching. Identify the color for each visible needle thread and specify whether the underside looper thread should match the fabric, match the contrast color or follow another approved reference. Use a physical thread card or approved sewn swatch when possible, since screen images are unreliable color standards. Ask for sample photographs of seam crossings and start-stop overlaps, as well as the uninterrupted hem. If thread material or size is important, agree it with the factory after a sewing trial that checks appearance, seam bulk and usable extension.
4. Approve the sample and lock the bulk reference
Build sample approval around a short measurement and appearance record rather than a single overall pass or fail. Measure bottom and sleeve hem depths at several named locations, confirm needle spacing, and inspect the underside for missed turnback, exposed edges or loose formations. Examine stitching where the hem crosses a side seam or sleeve seam, because added thickness can reveal problems that are absent on a flat section. Gently assess extension appropriate to the garment opening and inspect for broken or skipped stitches afterward. How to Approve Clothing Samples is companion reading for organizing these observations into a clear approval, rejection or revision request that the factory can act on.
Close the brief with commercial and production checkpoints. MOQ is 100 pcs; confirm how that quantity can be allocated across the requested styles, colors and sizes rather than assuming every split is available. Samples take approximately 7 days once the brief and materials are confirmed, with any special thread sourcing or revision needs clarified before scheduling. Bulk timing depends on quantity and should be confirmed against the approved construction and material plan. Retain a dated approved sample, annotated photographs and the final specification revision as the shared reference. Require approval for changes to fabric, thread or construction, and keep any requested compliance documentation separate from visual hem approval.
Send these details together
- List bottom and sleeve hems separately, with finished fold depth, visible needle spacing, measurement locations and agreed tolerances expressed in consistent units.
- Confirm coverstitch or twin-needle lockstitch explicitly, supported by face and underside references, needle count and a factory-confirmed construction method.
- Show the folding allowance, raw-edge position and seam placement, including separate instructions for side vents, stepped hems and bulky seam crossings.
- Approve production-intent fabric and thread references, then review relaxed waviness, contrast color, usable extension and appearance after the agreed care process.
- Record the approved sample revision, MOQ of 100 pcs, approximately 7-day sampling after brief and material confirmation, and quantity-dependent bulk scheduling.
This informational buying resource covers hem coverstitch briefing for menswear China OEM tees, henleys and polos. It does not establish laboratory performance results, certify products or guarantee compliance with any standard. Reprint permission: You may reprint this resource with attribution to clothingmanufacturerchina.com and sales@clothingmanufacturerchina.com.
Prepare a quote briefThe RFQ form prepares a WhatsApp message for you to review. For files, email sales@clothingmanufacturerchina.com.
Questions before sampling
What does hem coverstitch width mean in a factory brief?
It can mean either the finished folded hem depth or the spacing between visible needle lines, which is why the phrase should not stand alone. Specify both measurements separately for the bottom and sleeve hems. Add a labeled sketch showing the folded edge, needle lines and underside raw edge, then ask the factory to confirm the measurement interpretation before sample sewing.
Can twin-needle stitching replace coverstitch on a jersey tee?
Do not approve it as an automatic substitution. Twin needle can describe an appearance or a different machine construction, and a twin-needle lockstitch seam is not the same as a two-needle coverstitch seam. Request a sewn comparison using the intended fabric, inspect the underside and assess the extension needed at the opening. Approve any alternative through a revised specification and physical sample rather than a photograph alone.
How should buyers handle a wavy sample hem and production timing?
Ask the factory to investigate with the actual fabric and document a revised sewing trial. Assess the hem relaxed and, where relevant, after agreed washing and drying; pressing alone should not be the basis of acceptance. Samples take approximately 7 days once the brief and materials are confirmed, but clarify the schedule for revisions separately. MOQ is 100 pcs, and bulk timing depends on quantity, so confirm the production schedule after the corrected construction is approved.
What are your MOQ, sample time and bulk lead time?
MOQ is 100 pcs. Samples take 7 days. Bulk production lead time depends on order quantity.