How to Brief a Custom Cargo Pants Manufacturer
Briefing a custom cargo pants manufacturer starts with defining the woven garment, not simply selecting a reference photograph. Specify silhouette, rise, twill, canvas, or ripstop fabric, pocket layout, closures, reinforcement, waistband construction, and hem treatment together. Connect those choices to measured fit, pocket accessibility, and grading across the intended size range. MOQ 100 pcs per color per design is the starting requirement. Samples take approximately 7 days once the brief and materials are confirmed; bulk timing depends on quantity, material readiness, capacity, and approvals. Use documented sample and bulk gates to keep substitutions, construction changes, and size allocation visible before cutting.
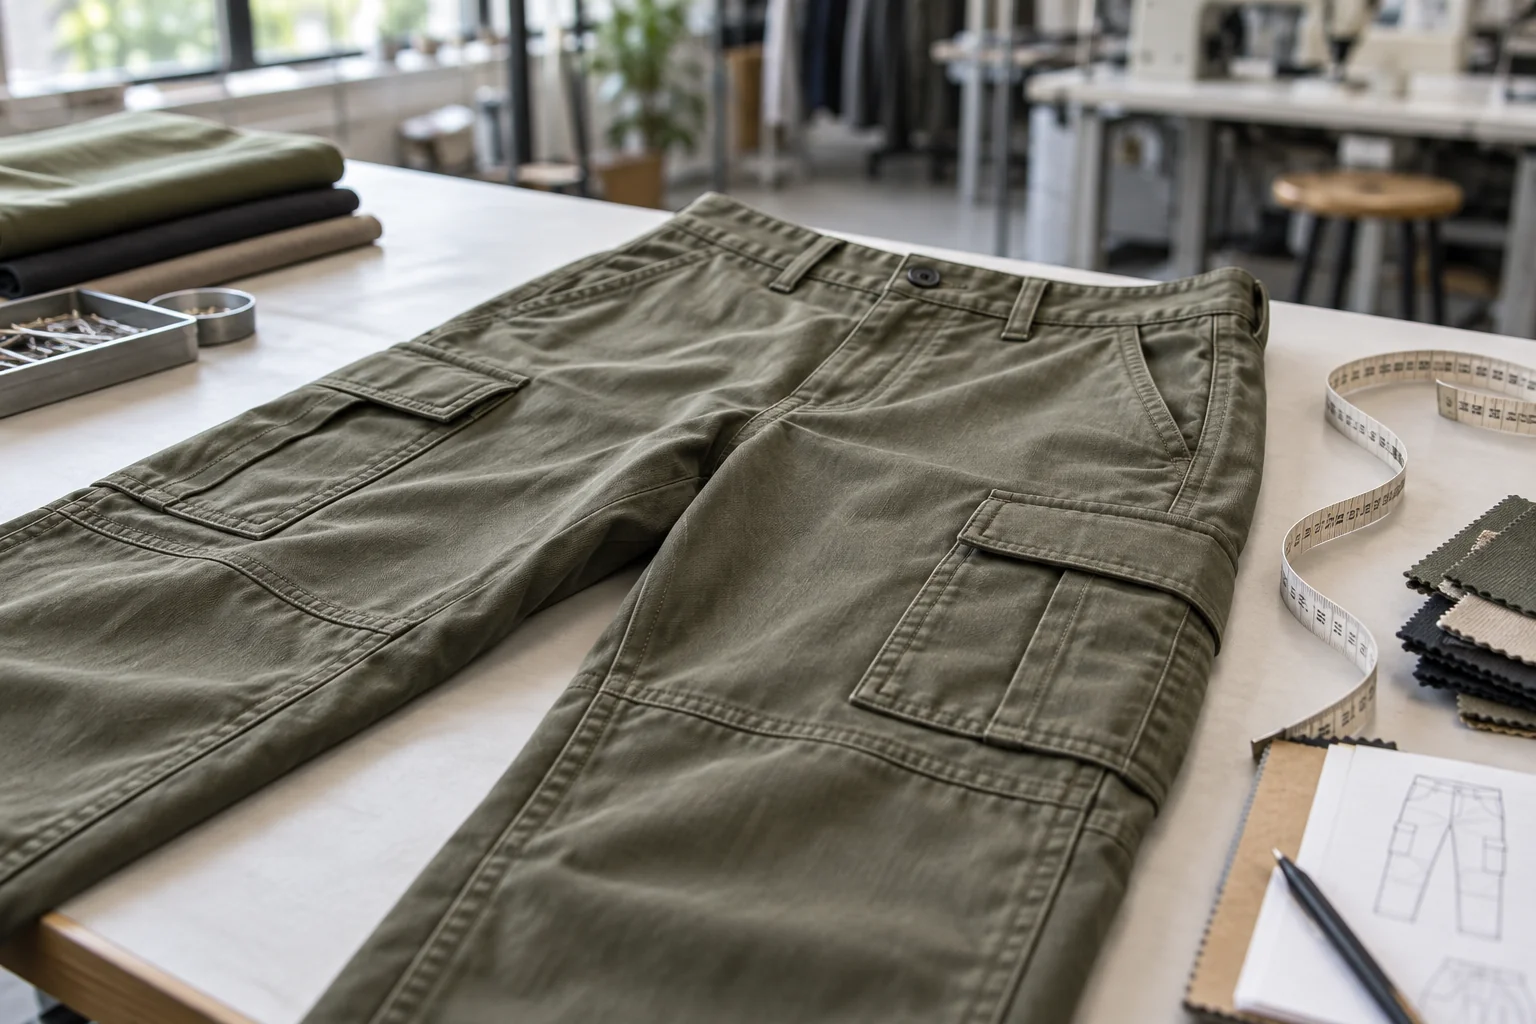
At a glance
Swipe the table sideways to compare both columns →
| Briefing point | Evidence to request | Decision or control |
|---|---|---|
| Silhouette and rise | Measured sketch, fit reference, points of measure, and size chart | Approve body ease and movement before locking pocket positions |
| Woven fabric | Identified twill, canvas, or ripstop article with width and finishing details | Verify shrinkage, handfeel, and seam bulk on actual material |
| Cargo pocket system | Pocket map, dimensions, entry direction, flap overlap, and closure samples | Check access, expansion, alignment, and reinforcement |
| Structural details | Knee and seat drawings, waistband section, belt loops, and hem construction | Resolve layer buildup and attachment methods before sampling |
| Size and production release | Grade rules, reviewed size samples, approved garment, and revision log | Authorize bulk only against a complete, current reference set |
1. Give your custom cargo pants manufacturer a measurable fit brief
Start by identifying the intended woven cargo pants silhouette: straight, tapered, relaxed, or wide leg, with the intended wearing position stated separately. Supply front, back, and side sketches rather than expecting a reference photograph to communicate hidden construction. Define front and back rise, waist, hip, thigh, knee, leg opening, and inseam through illustrated points of measure. State whether measurements refer to the garment laid flat, a circumference, or a stretched condition. Include tolerances and identify the sample size. Describe intended body ease and the expected underlayers, since a close seat and oversized cargo pockets can create conflicting fit requirements. If you supply an existing garment, mark which features should be copied and which should change. Ask the factory to flag inconsistencies between the sketch, measurement chart, and physical reference before developing the pattern.
Review rise and leg shape with the wearer standing, sitting, bending, and stepping up, using an agreed fit model or body measurement reference. Record waistband migration, seat tension, crotch restriction, and whether the knee position follows the intended silhouette. Do not correct every movement issue by adding overall width; the pattern may need a different rise balance, crotch shape, or knee allowance. Establish the fitting condition, including whether the sample has received the proposed garment wash or other finish. Keep pocket positions provisional until the main body fit is stable, but include representative pockets early enough to reveal their weight and interference. Photograph fit findings from consistent views and turn each comment into a measurement or construction instruction. Assign a pattern revision number so the factory does not combine an older rise with a newer leg shape.
2. Select twill, canvas, or ripstop against the finished garment
Specify a woven fabric article rather than requesting a generic cargo fabric. For twill, canvas, or ripstop, record fiber composition, weight in GSM, usable width, color reference, stretch direction if relevant, and the condition in which the material is supplied. Twill describes a weave family, canvas describes a construction category, and ripstop identifies a reinforcement pattern; none alone establishes durability or softness. Ask for labeled swatches and enough yardage to make a representative garment. Define the desired balance between structure and drape, especially where large pockets or elastic cuffs can distort a lightweight cloth. If stretch is required, request an agreed assessment of extension and recovery instead of relying only on elastane content. Keep this brief separate from denim cargo development, whose shade and washing controls may require a different material and approval route.
Identify whether the pants will be garment washed, softened, dyed, or supplied without a garment finishing process, and assign responsibility for that operation. Ask the factory to review dimensional change, skew, shade behavior, and seam appearance under the proposed route before finalizing consumption and patterns. Evaluate pocket corners, belt loop attachments, and reinforced knees on the actual fabric because several folded layers may become difficult to sew cleanly. Specify any required colorfastness or strength assessments with the method and acceptance criteria agreed in writing, rather than describing the pants as heavy duty without evidence. Confirm material minimums separately from garment minimums, including any dyeing or finishing commitment. Record the approved article and prohibit unreviewed substitutions. A replacement fabric with the same composition and weight can still change pocket sag, cuff gathering, shrinkage, or finished fit.
3. Map pocket count, placement, flaps, and closure details
Provide a numbered pocket map covering front hand pockets, back pockets, thigh cargo pockets, and any smaller internal compartments. State the total count and clarify whether a divided compartment counts as one pocket assembly or multiple storage spaces. For each cargo pocket, define finished width, height, depth, entry direction, and any bellows, pleats, or drainage openings. Locate the pocket from stable references such as the waistband seam and side seam, with the garment condition specified for measurement. Avoid relying on a sketch dimension measured from a movable flap edge. Describe whether the pocket should sit flat when empty or retain visible volume. Check its relationship to the knee, front pocket bag, and seated thigh crease. Ask the factory to show how left and right pockets will be marked and attached consistently before approving the placement.
Draw the flap shape, finished dimensions, overlap, edge stitching, and any interlining instead of leaving these details to the sewing room. Specify whether the closure uses buttons, snaps, hook-and-loop tape, zippers, or a combination, and identify concealed versus exposed components. Request actual closure samples with dimensions and attachment details so flap proportions can be checked against the selected hardware. Review access with one hand, interference from clothing, and whether the flap lies flat when the pocket is empty and when it holds the intended contents. Where carrying capacity matters, agree on representative contents and an evaluation procedure; do not infer a load rating from reinforcement alone. Mark stress points for bar tacks or another approved securing method. Keep pocket bag material, internal seam treatment, and closure backing in the bill of materials so hidden construction is not omitted.
4. Resolve reinforcement, waistband, belt loops, and hems
Specify whether knee and seat reinforcement means an added outer panel, an internal backing, a shaped double layer, or only stronger seam construction. Draw panel boundaries and indicate whether edges are turned, bound, or enclosed within adjoining seams. If the design includes articulated knees, distinguish shaping darts or seams from protective overlays; they serve different purposes and affect grading differently. Ask the factory to review the combined thickness where reinforcement meets cargo pockets, inseams, or side seams. Identify any openings for removable inserts, but do not imply protective performance without a separate verified specification. During sample review, bend and sit to check whether panel edges pull, rub, or create pressure. Compare the finished appearance after the proposed care or finishing process, since unequal shrinkage between layers can produce puckering even when the unwashed sample looks acceptable.
Define waistband height, structure, closure, and whether the waist is fixed, fully elasticated, partially elasticated, or adjustable. For elastic sections, specify relaxed and extended measurements with the measuring condition, and identify how elastic is secured against twisting. Give belt loop count, positions, finished opening, width, and attachment reinforcement, checking compatibility with the intended belt. Specify the fly construction and internal waistband finish rather than leaving them implicit in a front sketch. At the hem, choose an open turned hem, elastic cuff, rib cuff, drawcord adjustment, or tab closure and provide the relevant dimensions and components. Review how each option changes the effective inseam and leg opening. If cords or loose hardware are proposed, assess their suitability for the intended use and destination requirements. Confirm these components before finalizing sample materials and the garment quotation.
5. Grade the body and pocket system across the size range
Submit the full size range and order allocation alongside the base size chart, then request explicit grade rules for waist, hip, rises, thigh, knee, inseam, and leg opening. Do not assume that every dimension increases by the same amount between sizes. State whether inseam remains fixed, varies by size, or forms a separate length offering. Confirm how waistband elasticity or side adjusters affect the listed waist measurements. Ask the pattern team to identify where the selected silhouette becomes difficult to preserve at the smallest and largest sizes. Review representative size samples selected for the program, including range extremes where the risk justifies them. A successful base size fitting does not establish that the remaining sizes have acceptable seat balance, knee position, or access to the cargo pockets. Record size-specific corrections before releasing the graded pattern.
Decide which pocket dimensions stay constant and which grade with the garment. Keeping one pocket size may simplify cutting, but it can overwhelm a small thigh or look undersized on a larger garment. Define placement rules separately from pocket dimensions, including distance from the waistband, relationship to the side seam, and clearance above the knee. Check that flap corners and closures remain reachable across the selected sizes. Apply the same review to seat panels, knee reinforcement, belt loop spacing, and cuff openings rather than grading only the body shell. Request a graded placement drawing or comparable pattern evidence and verify it on representative garments. Avoid changing a pocket position solely to improve a flat photograph if that reduces seated comfort. Consolidate approved body and detail grades into one controlled specification, with deviations listed for any sizes requiring distinct construction or placement.
6. Link sample approvals to material booking and bulk release
Build the development sequence around clear decisions: confirm the brief, qualify materials and trims, approve fit and construction, review grading, then authorize the bulk reference. MOQ 100 pcs per color per design is the starting garment requirement; confirm the size split and any separate minimums for fabric, dyeing, closures, or other components. Samples take approximately 7 days once the brief and materials are confirmed. Allow additional time for unavailable materials, special hardware, shipping, revisions, and buyer review rather than treating that estimate as a complete development calendar. Require the factory to identify provisional sample components and explain what remains unverified. A sample made with substitute cloth may support an early silhouette discussion but cannot fully approve the intended handfeel, shrinkage, or multilayer sewing. Record sample charges, revision scope, and approval responsibilities in the development agreement.
Before bulk cutting, assemble an approved reference set containing the garment sample, current technical pack, graded measurement chart, pocket map, bill of materials, fabric identification, and finishing instructions. Resolve conflicting comments and identify who can authorize changes. Agree on inspection points for incoming fabric, early production, finished measurements, pocket symmetry, closure function, reinforcement, and final packing, with acceptance criteria documented for each. Set a hold-and-review procedure for substitutions or deviations instead of allowing informal approvals to circulate separately. Bulk timing depends on quantity, material readiness, capacity, finishing, and approval dates; request a schedule tied to these dependencies. Specify labels, size identification, packing allocation, and carton information before final inspection. Retain an approved sample and review the first bulk output against it so any needed correction can be assessed before the full order progresses through the same operation.
Send these details together
- Define silhouette, wearing position, rises, points of measure, tolerances, and the intended fitting condition.
- Identify the woven fabric article, usable width, finishing route, dimensional behavior, and separate material minimums.
- Approve a numbered pocket map with placement references, dimensions, flaps, closures, and stress-point construction.
- Resolve knee and seat reinforcement, waistband structure, belt loop openings, fly details, and hem or cuff options.
- Review body grade rules and pocket placement across representative sizes, not only the base size.
- Release bulk against a controlled reference set with material approvals, inspection criteria, change authority, and packing instructions.
This guide covers buyer-side planning for woven custom cargo pants with a China clothing OEM, including twill, canvas, and ripstop rather than denim cargo development. MOQ 100 pcs per color per design is the starting garment requirement; confirm size allocation and separate material or trim minimums. Samples take approximately 7 days once the brief and materials are confirmed; bulk timing depends on quantity, materials, capacity, finishing, and approvals. Protective performance claims require separate specifications and verification beyond this construction brief. Reprint attribution: clothingmanufacturerchina.com.
Prepare a quote briefThe RFQ form prepares a WhatsApp message for you to review. For files, email sales@clothingmanufacturerchina.com.
Questions before sampling
Which fabric should I choose for woven cargo pants?
Choose against the intended silhouette, use, and finish rather than the fabric name alone. Twill, canvas, and ripstop each cover different weights, compositions, and constructions. Request an identified article and assess an actual-fabric sample for drape, pocket support, seam thickness, and dimensional change. Confirm usable width and material minimums before treating the garment quotation as complete.
Should cargo pockets increase in size with every garment size?
Not automatically. Set pocket dimensions and placement rules separately, then review their proportions and accessibility on representative sizes. A constant pocket size may work across part of a range, while wider ranges may need adjusted dimensions or positions. Check seated comfort, knee clearance, and flap reach before approving the graded pocket map with the body pattern.
Does MOQ 100 pcs per color per design include custom fabric and hardware?
That figure is the starting garment requirement, not a commitment that every material or component is available at the same quantity. Custom fabric, dyeing, snaps, zippers, and other trims can carry separate minimums. Ask the OEM to show those commitments, the proposed size allocation, and any surplus ownership or stock alternatives before approving material purchasing.
What should be approved before cargo pants enter bulk production?
Approve the intended fabric and trims, finished fit, pocket construction, reinforcement, grade rules, and the applicable finishing route. Connect the approved garment to a current technical pack and bill of materials. Identify any remaining sample substitutions and close those approvals before cutting. Agree on inspection criteria, change authorization, packing requirements, and a schedule that reflects material readiness and order quantity.
What are your MOQ, sample time and bulk lead time?
MOQ is 100 pcs. Samples take 7 days. Bulk production lead time depends on order quantity.